
Making arepas at home takes three ingredients, one bowl, and about 30 minutes. The result is a golden, tender cornmeal patty that has fed Venezuelan and Colombian families for centuries, and one that fits beautifully into an Australian kitchen. Whether you’re after a quick weeknight meal or a crowd-pleasing snack, this is a recipe worth mastering.
The essentials are simple:
- Pre-cooked white cornmeal (masarepa): the non-negotiable base
- Water: warm or room temperature works best
- Salt: just enough to season the dough
- Optional: a knob of butter for richness, or a pinch of sugar for Colombian-style arepas
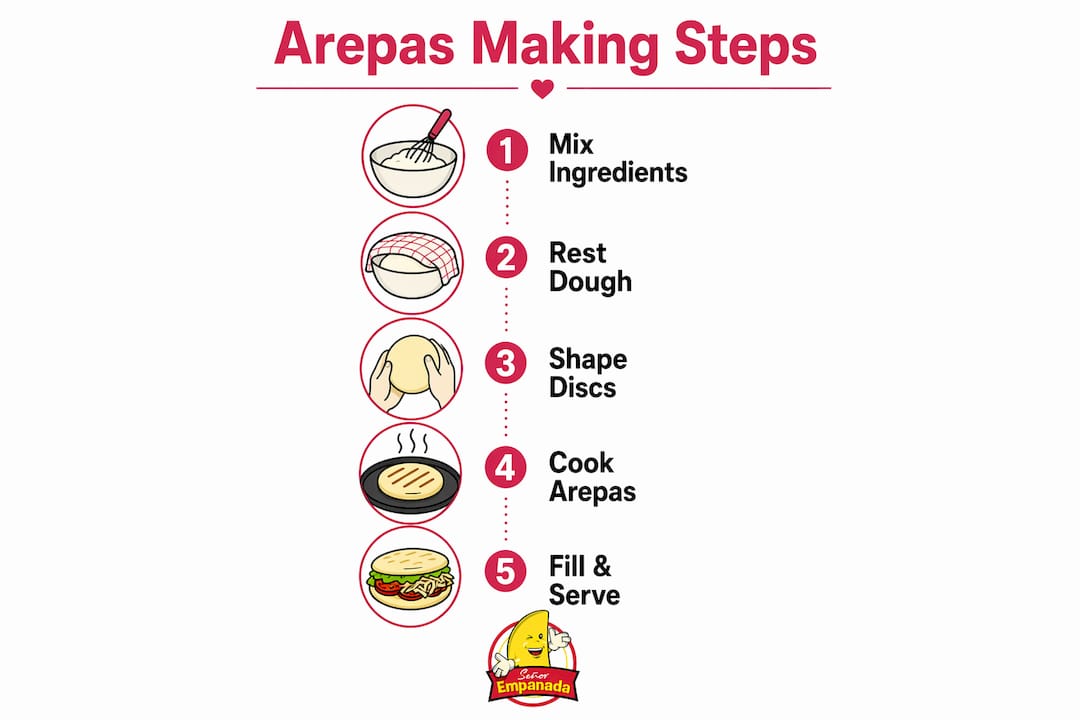
Mix, rest, shape, and cook. That’s the whole process. You can pan-fry, bake, or grill them, and fill them with anything from shredded cheese to slow-cooked beef. Arepas are, at their heart, a brilliant bread delivery system for whatever flavours you love.
What ingredients do you need to make authentic arepas?
The single most important decision you’ll make is choosing the right flour. Pre-cooked masarepa is the only flour that works for authentic arepas. It is ground from cooked corn, which gives the dough its characteristic soft, creamy texture. Regular cornmeal (the kind used for cornbread) and masa harina (used for tortillas and tamales) are both ground from uncooked or nixtamalized corn, and neither produces the right result. Food expert Ananda Eidelstein puts it plainly: using the wrong flour is the most common mistake home cooks make.
The two most widely available masarepa brands in Australia are P.A.N. and Goya, both of which you can find in Latin American grocery stores, select supermarkets, and online retailers; for those in Melbourne, specialized help can be found through Restaurant Inventory Software Melbourne | PantryHub. P.A.N. comes in its iconic yellow packaging and is often stocked in the international aisle. You may see both white and yellow masarepa on the shelf. They taste and behave identically, so choose whichever is available. Alimentos Masarepa is another brand worth seeking out if you want to explore locally imported options from Colombian producers.
- P.A.N. or Goya masarepa: available at Latin American grocers and online across Australia
- Butter (optional): adds creaminess to the dough, particularly in sweeter Colombian-style versions
- Egg or grated cheese (optional): can be kneaded into the dough for extra richness
- Avocado oil or olive oil: for cooking
Pro Tip: If you’re in Sydney, Latin American specialty grocers in suburbs like Marrickville and Fairfield often stock P.A.N. masarepa. Melbourne’s Preston and Footscray markets are also reliable spots. For a broader view of corn-based dough options, the gluten-free masa guide at Senor Empanada covers flour choices in detail.
How to make arepas step by step
This method produces several arepas, each about a finger-thick and palm-sized disc.
Ingredients
- Masarepa (white or yellow, or a mix of both)
- Warm water, plus extra as needed
- Salt
- Butter (optional)
Method
- Dissolve the salt. Stir salt into the warm water in a large bowl until fully dissolved.
- Add the masarepa. Pour in the flour gradually, mixing with your hands or a spoon until a soft dough forms. It should feel like Play-Doh: pliable, slightly moist, and not sticky.
- Knead briefly. Work the dough for 1–2 minutes to eliminate dry spots. If using butter, knead it in now.
- Test the dough. Pinch off a small piece and press it between your palms. If the edges crack, the dough is too dry. Add water one tablespoon at a time until it holds together smoothly.
- Rest for 5–10 minutes. Cover the bowl with a clean cloth. Resting is critical: the cornmeal continues absorbing moisture, making the dough far easier to shape without cracking.
- Shape the arepas. Divide the dough into 6–8 equal portions. Roll each into a ball, then press between your palms, rotating gently, until you have an even disc about 1.5 cm thick. Smooth any cracked edges with a moistened finger.
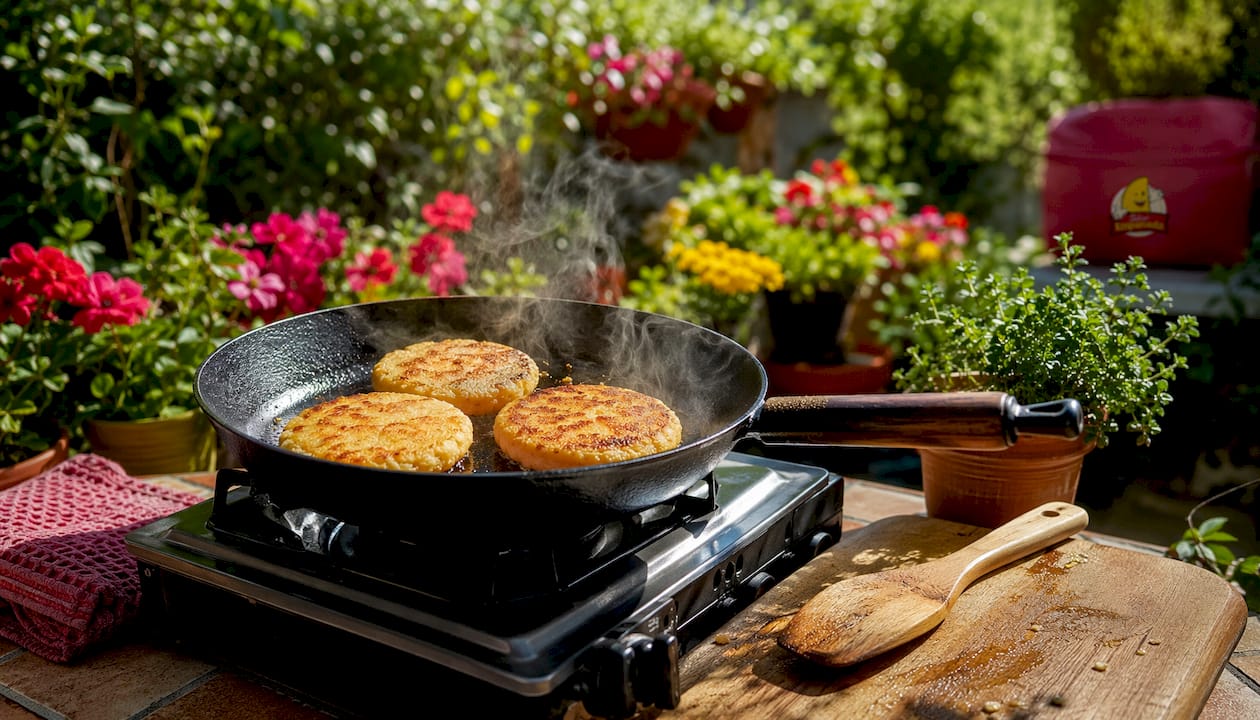
- Pan-fry. Heat a non-stick or cast-iron skillet over medium heat and brush lightly with oil. Cook the arepas in batches, flipping every 5 minutes, for 20–25 minutes total, until both sides are deep golden brown.
- Optional oven finish. Transfer pan-fried arepas to a 180°C oven for 10–15 minutes. This causes them to puff slightly, like a pita, and produces a crispier crust with a fully cooked centre.
- Slice and fill. While still warm, cut each arepa open with a thin serrated knife, working horizontally like you’d split an English muffin. The steam inside will help melt butter or soften cheese.
Pro Tip: Mixing white and yellow masarepa in equal parts gives a beautiful golden colour and a slightly lighter flavour. It’s a small touch that makes a noticeable difference.
Key cooking notes:
- Use just enough oil to coat the pan, not a deep fry
- A golden-brown crust with a few darker spots is perfectly fine
- The centre should feel firm but yielding when pressed, not doughy
How do you serve and fill arepas?
Arepas are one of the most versatile foods in Latin American cuisine, moving easily from breakfast table to dinner plate to party platter. At their simplest, a split arepa spread with butter and filled with shredded white cheese is a complete and deeply satisfying meal. That combination, known as an arepa con queso, is the version that captured hearts in the film Encanto and sparked a wave of home cooks wanting to recreate it.
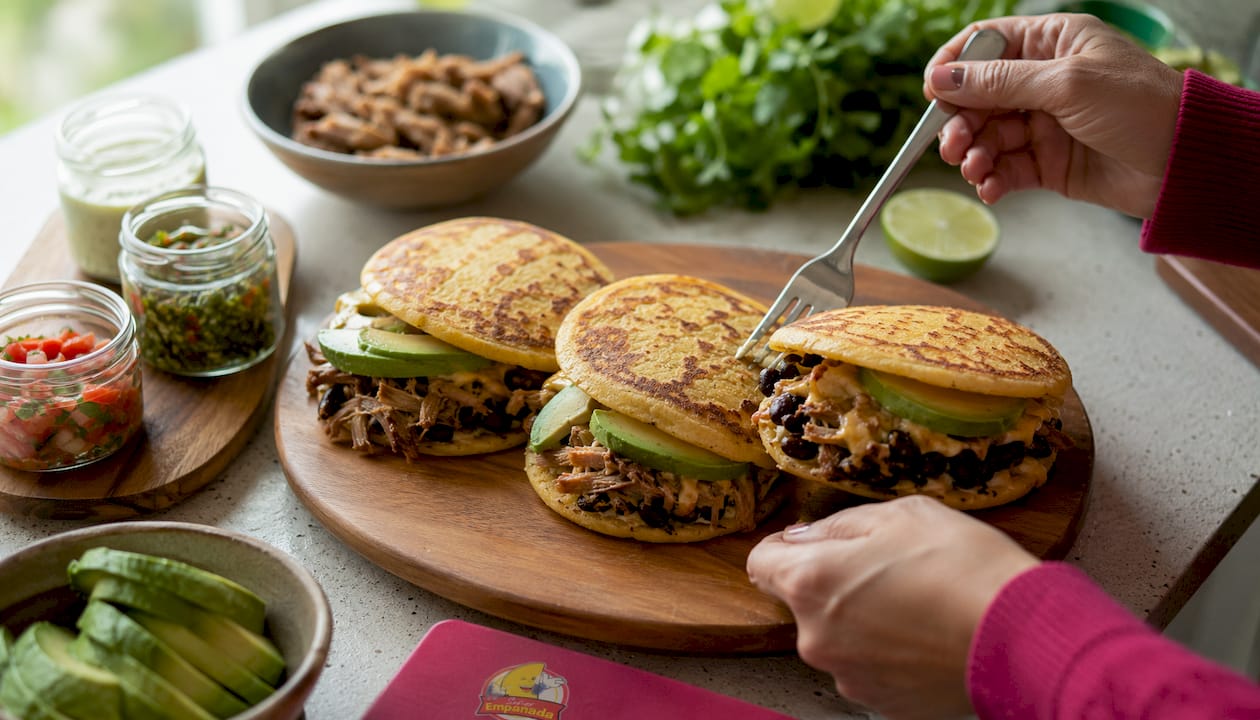
Popular fillings include shredded beef, pulled pork, black beans with crumbled white cheese (arepa dominó), scrambled eggs, and avocado salad with shredded chicken (reina pepiada). For a plant-based version, guacamole, roasted sweet potato, and sautéed black beans work beautifully together. Arepas also shine as party finger food, sliced into quarters and topped like canapés.
Storage is straightforward. Cooked arepas keep in the fridge for 3–4 days and reheat well in a 180°C oven. Uncooked shaped arepas freeze for up to one month; thaw them fully before cooking as normal.
Common mistakes and expert tips for perfect arepas
The most frequent pitfall is flour substitution. Masa harina and regular cornmeal simply cannot replicate the texture of masarepa, no matter how the recipe is adjusted. If you cannot find masarepa locally, a workaround using masa harina combined with coconut flour and a gluten-free starch can approximate the result, though it is not traditional.
Dough hydration is the second most common stumbling block. Skipping the rest period produces dry, brittle dough that cracks during shaping and splits open during cooking. Conversely, dough that is too wet will not hold its disc shape. The fix in both directions is gradual: add water or flour one tablespoon at a time, testing after each addition.
- Dough cracks when shaping: add water, one tablespoon at a time, and knead gently
- Dough sticks to hands: sprinkle in a little extra masarepa, a pinch at a time
- Arepas are doughy inside: finish in the oven at 180°C for 10–15 minutes after pan-frying
- Crust is pale: increase heat slightly or extend cooking time; the pan may not be hot enough
Pro Tip: Smooth any surface cracks with a fingertip dipped in water before cooking. This takes seconds and prevents the arepa from splitting open in the pan.
Arepa dough is genuinely forgiving for beginners. Unlike bread or pasta dough, it does not require precise timing or technique. If something goes wrong, it can almost always be corrected before the arepas hit the pan.
What texture should a perfect arepa have?
A well-made arepa has a firm, golden crust that gives a satisfying resistance when you bite through it, and a soft, slightly creamy interior with a texture similar to polenta. The outside should not be hard or brittle, and the inside should never be gummy or raw-tasting.
The pan-fry-then-bake method produces the best of both worlds. Pan-frying builds the crust; the oven cooks the centre through without drying out the exterior. If your arepas are consistently doughy inside, the dough is likely too thick (aim for 1.5 cm) or the pan temperature is too high, which browns the outside before the heat reaches the centre.
Tactile feedback during shaping tells you a great deal about the final texture. Dough that feels smooth and slightly tacky will cook to a tender interior. Dough that feels stiff or crumbly will produce a dense, dry arepa. Trust your hands as much as the recipe.
At Senor Empanada, we believe the best Latin American food starts with the right ingredients and a genuine respect for tradition. If you love the flavours of arepas, you’ll find the same spirit of authenticity in our Latin American recipes, from empanadas to sauces made the way they were always meant to be made.
Key takeaways
Authentic arepas require pre-cooked masarepa flour, a proper rest period for the dough, and a pan-fry-then-bake cooking method to achieve a golden crust and tender centre.
| Point | Details |
|---|---|
| Use masarepa only | P.A.N. and Goya are the go-to brands; masa harina and regular cornmeal cannot substitute. |
| Rest the dough | A 5–10 minute rest lets the cornmeal fully hydrate, preventing cracks during shaping. |
| Pan-fry then bake | Fry for 20–25 minutes until golden, then finish in a 180°C oven for a fully cooked centre. |
| Fix cracks with water | If dough cracks when pressed, add water one tablespoon at a time until edges are smooth. |
| Store and reheat easily | Cooked arepas keep 3–4 days in the fridge; uncooked arepas freeze for up to one month. |
FAQ
How do you make arepas at home?
Mix 2 cups of masarepa with 2 cups of warm salted water, rest the dough for 5–10 minutes, shape into 1.5 cm thick discs, and pan-fry over medium heat for 20–25 minutes, flipping every 5 minutes, until golden brown.
Which flour is best for arepas?
Pre-cooked white cornmeal, sold as masarepa under brands like P.A.N. and Goya, is the only flour that produces authentic arepas. Masa harina and regular cornmeal are not suitable substitutes.
Are arepas difficult to make?
Arepas are one of the more forgiving doughs a home cook can work with. If the dough cracks, add a little water; if it sticks, add a little flour. Most batches come together well within 30 minutes.
What exactly are arepas made of?
Traditional arepas are made from pre-cooked cornmeal (masarepa), water, and salt. Optional additions include butter, egg, or grated cheese kneaded into the dough for extra richness and flavour.